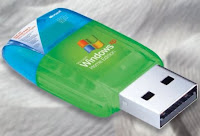
CaRa mEmbuAt Hiren’s BOOT CD, XP, Vista / Windows 7 dALAm SAtu FLaShdiSk
Published By syMB4h3 cool On Tuesday, May 22nd 2012. Under IT, SoluSi MasalaH-mAsaLah "VIRUS", TiPs & TRiks, Under Cover Tags: wInDoWs seVeN, DeteKSi viRus, Tips & Trik, tips merawat Flashdisk, Windows XP, Hiren's boot CD
Keperluan mulitboot buat user PC memang sangat banyak membantu, untuk menggabungkannya ke dalam USB flash memang membutuhkan cara khusus.  Untuk
menggabungkan Hirens BootCD, Windows XP, & Windows Vista/7 dalam
satu flash disk, ikuti cara berikut: Yang perlu disiapkan:
Untuk
menggabungkan Hirens BootCD, Windows XP, & Windows Vista/7 dalam
satu flash disk, ikuti cara berikut: Yang perlu disiapkan:1. Hirens BootCD (disarankan versi 9.7 keatas)
2. CD Installer Windows XP (rekomendasi SP3)
3. DVD Installer Windows Vista/Windows7
4. USB_MultiBoot_10
5. GRUB4DOS
NB: Untuk Software USB Multiboot & GRUB4DOS bisa anda copy file masternya dari Hiren’s boot cd nya.
free download All Hiren’s Boot Cd di sini>>>
Langkah-langkahnya:
Integrasi Windows XP
1. Ektsrak USB MultiBoot 10 ke hardisk (mis di C:\USB_MultiBoot_10\). Masukkan CD Windows XP kedalam CD/DVD drive atau mount dengan PowerISO atau DaemonTools.
2. Colokkan UFD kemudian dari dalam folder USB_MultiBoot_10, jalankan file USB_MultiBoot_10.cmd. (lihat gambar no.1)
gambar no.1 : USB_MultiBoot_10.cmd
3. Akan muncul jendela prompt Windows, tekan sembarang tombol untuk mulai (Press any key to continue).
4. Berikutnya adalah memformat flash disk USB. Ada 2 tool yg disediakan untuk memformat flash disk anda:
- PeToUSB : flash disk masimal 2GB, dengan system file FAT.
- HP USB Disk Storage Format Tool : Flash disk diatas 2GB dengan system file FAT & NTFS.
5. Pilih jenis tool utk format FD-nya (saya pake HP USB Disk Storage) lalu tekan tombol H & tekan ENTER. (lihat gambar no.2)
gambar no.2 : HP USB Disk Storage Format Tool
gambar no.3 : Pilih system file dalam hal ini NTFS
6. Pastikan nama Flash disk USB sdh tertera pada kotak Device HP USB Disk Storage Format dan pilih system file NTFS supaya proses instalasi dari FD jauh lebih cepat. Kalau sudah siap, tekan tombol Start. Tekan tombol Yes untuk pertanyaan message-box dari tool HP USB.
7. Kalau proses format sudah selesai, klik tombol Closedan anda akan diantar ke jendela berikut: (lihat gambar no.4)
gambar no.4 : Menentukan Lokasi Windows XP
- Tekan angka 1 pada keyboard lalu tekan ENTER. Pilih lokasi drive Windows XP. (lihat gambar no.5)
gambar no.5 : Letak Windows XP
- Klik tombol Yes pada kotak Unattended Install ? XP Setup UserData in winnt.sif and $OEM$yg muncul. Selanjutnya silakan isi informasi nama user, organisasi, product key XP, nama komputer, password, dsb sama seperti melakukan instalasi normal dari CD installer XP. Jadi, nanti tidak perlu lagi mengisi data2 instalasi saat menginstal XP dari Flash disk.(lihat gambar no.6)
gambar no.6 : Unattended Install
- Selanjutnya tekan angka 2 lalu ENTER. Pilih lokasi drive FD.(lihat gambar no.7)
gambar no.7 : Lokasi drive UFD
- Ketik angka 3 lalu tekan ENTER untuk mulai menyalin file2 instalasi XP kedalam FD. Baca kotak2 pertanyaan yg muncul dan iyakan saja.
8. Tahap pembuatan instalasi XP USB sudah selesai, tekan Q untuk menutup USB_MultiBoot_10.cmd.
Integrasi Hirens BootCD
1. Masukkan/mount CD/ISO Hirens dalam drive CD/DVD-ROM.
2. Copy folder HBCD dan file autorun.inf dari dalam drive Hirens BootCD ke dalam UFD.(lihat gambar no.8)
gambar no.8 : Copy file HBCD & Autorun.inf
3. Ekstrak file grub4dos.zip yang sudah didownload, kemudian copy file gldr dan file menu.lst dari hasil ekstraksi tersebut ke dalam UFD.(lihat gambar no.9)
gambar no.9 : Copy file gldr & menu.Ist
Sekarang, FlashDisk USB multiboot sudah jadi dengan Windows XP dan Hirens BootCD di dalamnya. Tinggal mengatur BIOS PC/laptop supaya bisa booting dari USB FD.
Integrasi Windows 7/Vista
Copy semua isi DVD Windows 7/Vista kedalam UFD. Buka file menu.lst dalam UFD dengan notepad lalu tambahkan baris berikut didalamnya:(lihat gambar no.10)
Code:
title Windows 7 root (hd0,0) chainloader /bootmgr
1.title Windows 7
2.root (hd0,0)
3.chainloader /bootmgr
gambar no.10 : kode yang wajib di masukkan
Selesai!! Special thanks for narcophilia for this tutorial info.
Selamat mencoba, semoga bermanfaat.
